2d drawings of 3d shapes worksheet
This tutorial explains how to shade basic 3d shapes such equally cubes, spheres, cylinders and cones. These shapes can considered the "building blocks" for drawing more complex objects.

Learning to correctly describe and shade basic iii dimensional shapes is very important for beginner artists.
Please note that in social club to keep the tutorial accurate all of the examples were fatigued from real life objects. Every bit a outcome this also created some pocket-size variations in the lighting conditions between them due to the master light source (the sun) moving through out the mean solar day. This is only stated and then that you know why some of the lighting is slightly unlike and has no real impact on the tutorial. All objects all the same have one main light source coming from the meridian left and slightly to the front of them. If you were to have one of these in front end of you in a similar lighting setup then the light would be coming over your left shoulder.
Before getting started on this tutorial you may also want to larn about different types of shading strokes by looking at:
Shading Techniques and Stroke Types Drawing Tutorial
Likewise please exist enlightened that unlike artists may prefer different shading methods. For instance some may utilize simple one directional strokes while the method in this tutorial is to apply the strokes in such a way as to help emphasize the shape of the object.
How to Shade a Cube

Outset by brand a in perspective light line drawing of the cube. Yous tin can run into the Perspective Cartoon Tutorial for Beginners for an explanation on how to do this.
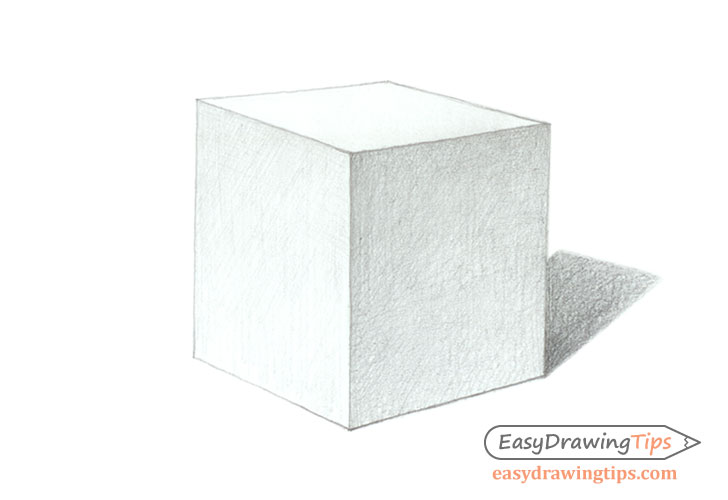
Before applying the shading there are a few things yous should be aware of. One is that generally cubes tend to have a light, medium, and a night side. Some other is that each side will likewise tend to have a low-cal to night slope of its ain. In the above example the top side of the cube is the lightest and the right side the darkest. The gradients on the left and right sides of the cube are lighter towards the bottom and darker towards the top. This is acquired by the reflection of the main calorie-free source from the surface that the cube is sitting on.
The cube will also cast a shadow directly opposite the low-cal source. In this example information technology will be to the right and slightly behind it. As the main light source is adequately vivid and high upward above the cube it volition create a well defined short shadow. Considering the cube is white the shadow will also be significantly darker.
For the actual process of shading the cube you can use straight crosshatch strokes. For each side first brand a set of strokes parallel to information technology'due south perspective lines and subsequently apply some other ready of strokes at a unlike angle. The first set of strokes will help reinforce the shape of the cube while the other set will help blend the shading making information technology appear more natural.
Y'all can use a crosshatch for shading the shadow as well. Start by making strokes forth it's general management and then add a second layer on a slight angle to the get-go one. Make the shadow darker at the base (near the cube) and lighter equally information technology moves away form it. You can also make the edges of the shadow more blurry the further away it is from the object.
How to Shade a Sphere
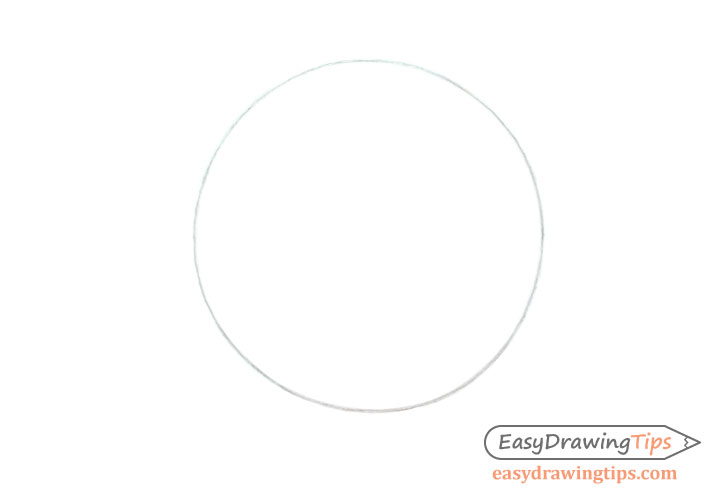
Get-go the drawing of the sphere past simply making a circumvolve.
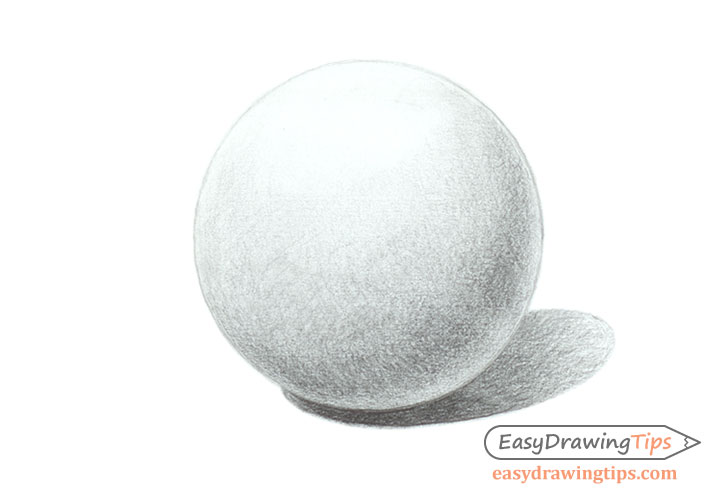
For the "ane lite source" basic setup we are using the surface of sphere will gradually transition from it's lightest point (top left in this instance) to dark and then to light again. The 2nd transition will be due to the light reflecting from the surface it'southward resting on. It's besides of import to note that the calorie-free area created by the reflection volition not be as bright as the expanse lit by the main light source.
The darkest expanse is the point at which the curve of the sphere faces the farthest abroad from both the principal lite source and the reflection.
Similar to the previous example the shadow will be bandage opposite the main light source (to the right and slightly behind the sphere).
When shading a sphere a proficient choice may exist to use lightly curved crosshatch strokes as the curves tin help emphasize the spheres round shape. You can apply the first set in any random direction. Apply the 2d set on an angle to the start one.
Unlike the sphere you can use straight crosshatch strokes for the shadow. You lot can likewise apply the first set in any management you like with the 2d set on a slightly angle in relation to the outset i.
Make the shadow darker towards (right underneath the sphere) and lighter as it moves away from information technology. You tin also make it's edges more blurry the farther it moves from the object.
How to Shade a Cylinder
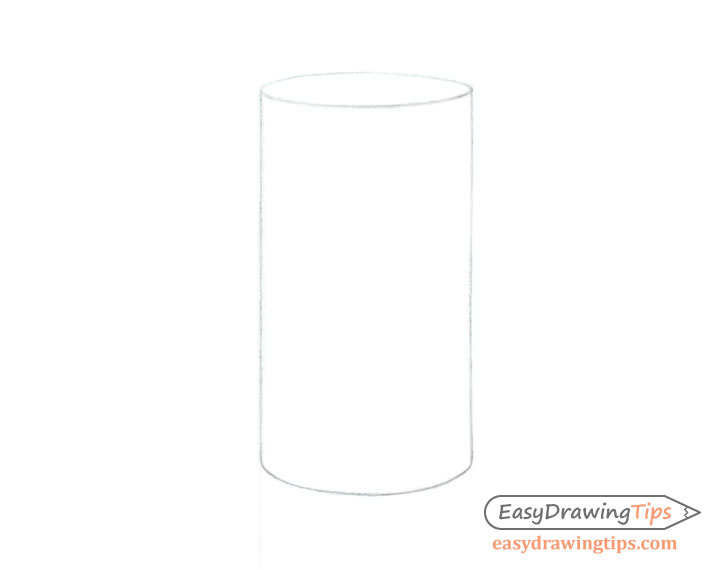
Start by making an in perspective line drawing of the cylinder. You lot tin see the How to Draw Cylinders in Perspective Tutorial for instructions on how to practice this.
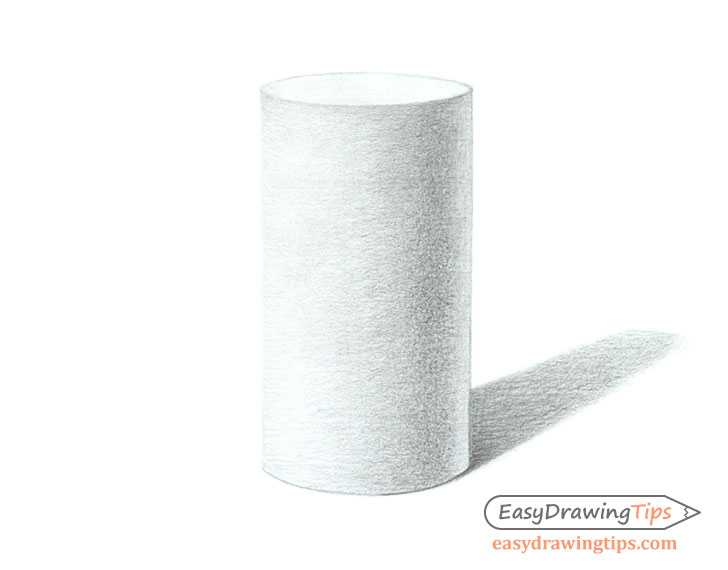
Shading the cylinder will exist somewhat of a combination between the sphere and the cube. In the lighting setup described before it will accept a light top with the balance transitioning from light to dark and so to light again.
Equally the curve of the cylinder gets farther abroad from the main calorie-free source it will become darker. By that it will get lighter again equally it curve turns more towards the light reflecting form the surface. The darkest area volition once once again (similar the sphere) be the point of the bend farthest from both the main lite source and the reflected light.
As the 2 previous examples the shadow will be bandage opposite the main light source (to the right and slightly backside the cylinder).
You tin apply the shading strokes in a curved crosshatch that wraps along the shapes of information technology's meridian and bottom curves.
Shade the shadow by making straight crosshatch strokes, darker at it'due south base and lighter and more blurry every bit it moves away from the object.
How to Shade a Pyramid
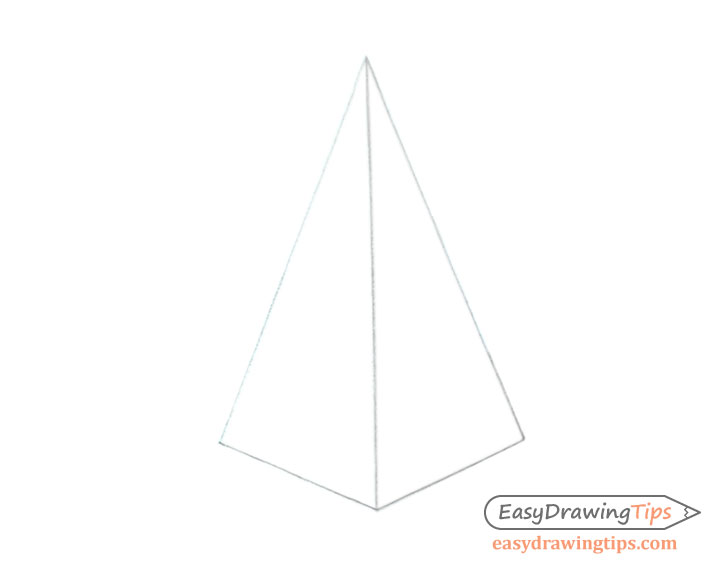
First brand an in perspective line drawing of the pyramid. For instruction on doing this run across:
- How to Draw a Pyramid in One Point Perspective
- How to Describe a Pyramid in Ii Point Perspective
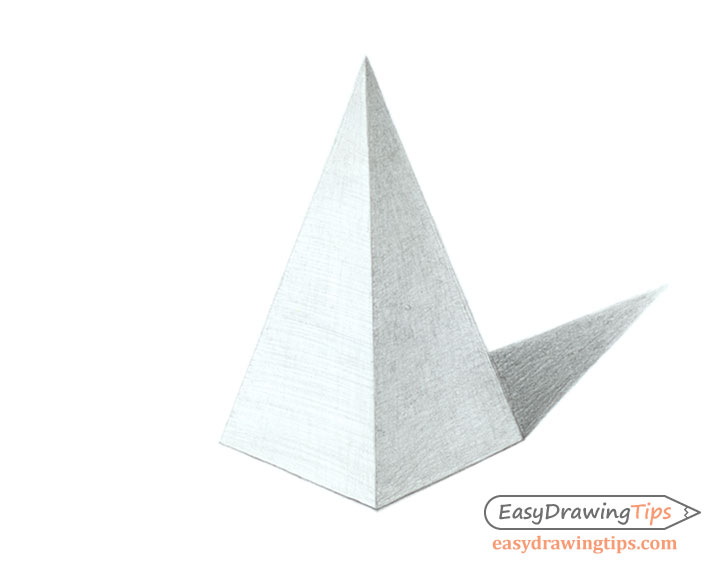
Shading a pyramid drawing like the one in this example is fairly simple every bit there are just two visible sides. The side facing towards the light volition be lighter and the side facing abroad from information technology volition exist darker.
Similar to the cube each side of the pyramid volition too have it's own light to night transition due to the reflection of the main light source from the surface that its sitting on. In a lighting setup such every bit that in the above example each side volition transition from a lighter bottom to a darker tiptop.
Same equally the other examples the shadow volition exist pointing directly away from the low-cal source. In this case to the right and slightly behind the objects.
Again similar to the cube apply a ii sets of direct strokes to create a crosshatch. Make the first sets follow the perspective lines of each side of the pyramid with the 2nd prepare being on a slightly bending to them.
Make the shadow darker at the base and lighter and more than blurry toward the tip.
How to Shade a Cone
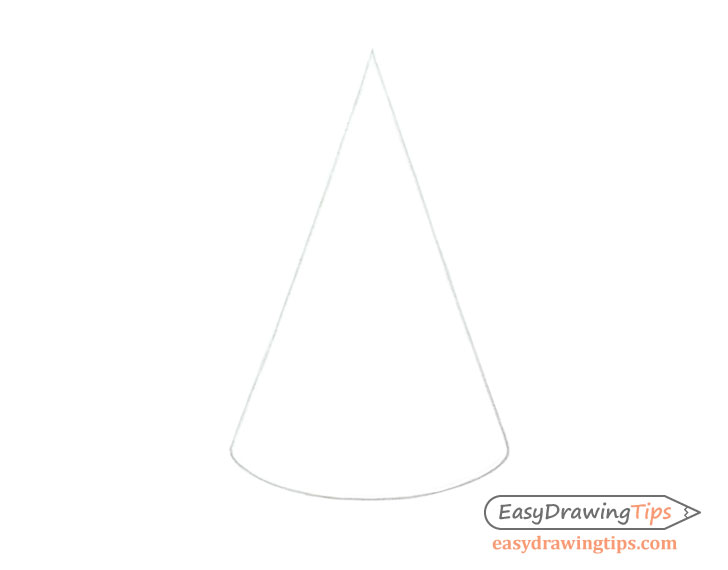
Brand a perspective cartoon of the cone. For instruction on doing this come across the How to Draw a Cone in Perspective tutorial.
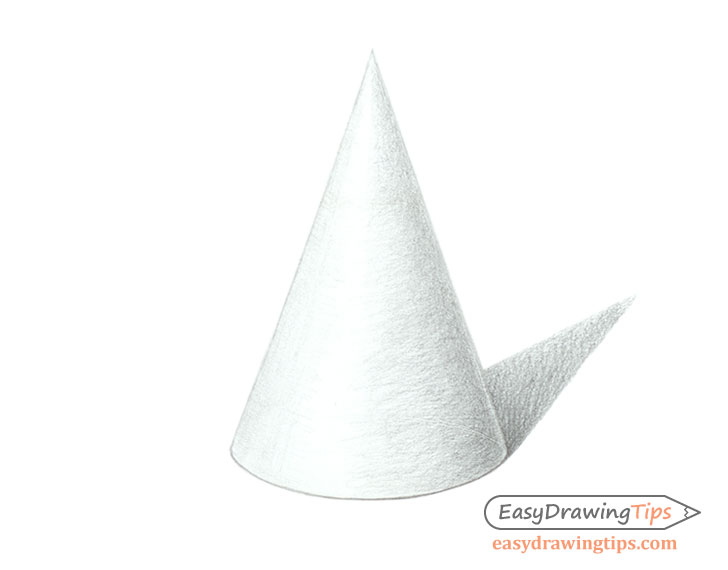
As mentioned earlier the lighting weather for this particular example are slightly unlike in that the main low-cal source will be a little more in front of it than in the other examples. This volition move the lightest area of the cone slightly more towards information technology's middle and create a gradient on its left going from left to dark. The correct side of the cone will transition from light to dark and and then to low-cal again (from the reflected light).
The shadow will again be pointing to the right and slightly behind the object (a little more to the dorsum in this example).
Shading the cone is very like to shading a cylinder the simply difference is that everything volition become narrower as it goes towards the top. Just like the cylinder you can shade it with a curved crosshatch strokes. Make the outset set with curves somewhat matching the bend of it'due south lesser and the second attack a slight angle in comparison.
The shadow volition exist pretty much the same every bit that of the pyramid. Shade it with straight crosshatch strokes darker towards the base of operations and lighter and blurrier towards the tip.
How to Shade an Octagonal Prism
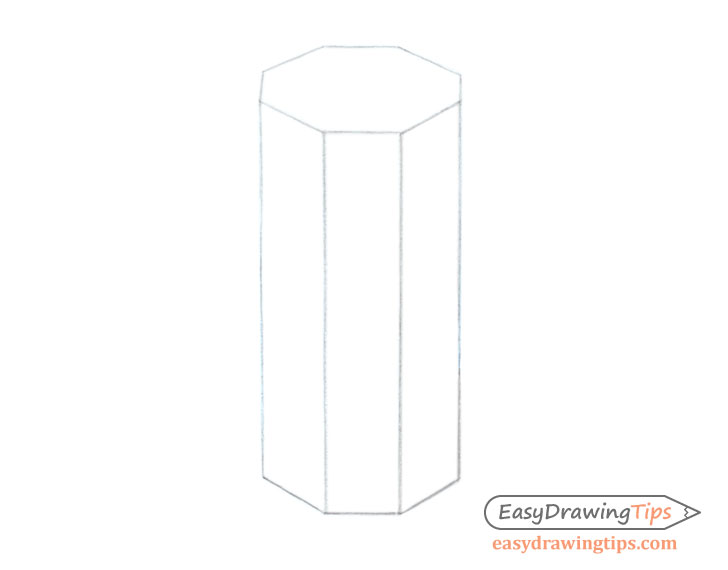
Start by making a light line cartoon of the octagon prism. To do this you tin kickoff describe a rectangular prism and so "trim" it'southward sides to get the octagon. You can over again see the Perspective Drawing Tutorial for Beginners for assist.
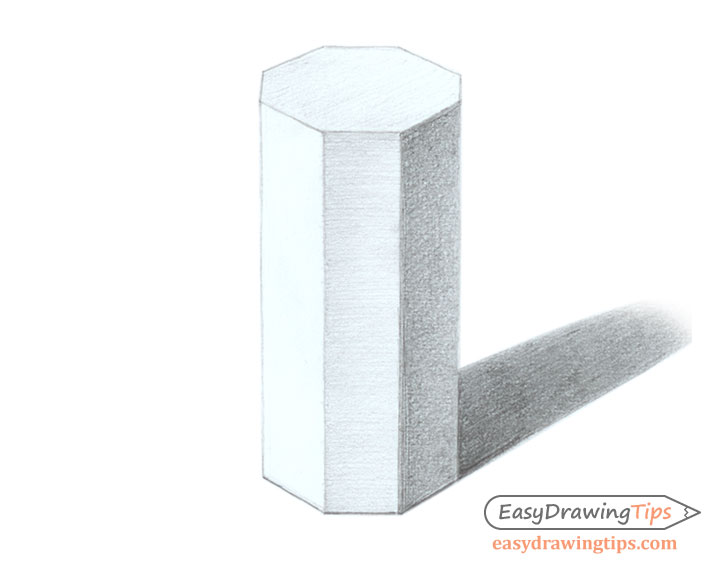
In the lighting conditions described earlier the lightest side of the octagon prism will be on the left and the darkest on the right. The left side in this example is facing almost directly towards the main light source and therefore is bright enough that it does not really demand whatsoever shading.
Same as the other examples the other sides of the prism will take their ain calorie-free to dark gradients. The light reflecting form the surface will again make these gradients lighter towards the lesser and darker towards the top.
The shadow will be cast opposite the main lite source (straight opposite the left department) to the right and backside the prism.
As the sides of the prism are fairly narrow you can use a single set of one directional strokes or a crosshatch for shading them. In this example the middle section is washed with i directional strokes while the darker correct side is washed with a crosshatch.
Shade the shadow using crosshatch strokes with the first set along its full general direction and the second set angled in relation to that i.
For shading another like object you can besides come across:
How to Draw a Realistic Banana Tutorial
Determination
These 3d shapes are the basic building blocks of many more than complex objects. Learning to properly draw and shade them tin brand information technology much easier to motion on to drawing things that are more circuitous.
For more similar tutorials likewise come across:
- Egg Step past Step Bones Shading Tutorial
- How to Describe a Realistic Pear Tutorial
Source: https://www.easydrawingtips.com/shading-basic-3d-shape-drawings-tutorial/
Post a Comment for "2d drawings of 3d shapes worksheet"